If you are looking to download a basic, barebones WordPress block theme to test this new feature in WordPress, look no further. Below is a download link to a basic empty block theme, generated with the Create Block Theme plugin from the WordPress developers. Simply unzip this file into your themes-directory, activate it in the themes section of the dashboard and you should be good to go.
Priority system for console.log()
When developing websites and applications with JavaScript we often write console.log() messages between our lines of code.
Things can get a little bit annoying when your console starts to fill up with a lot of these messages and you might feel like you want to focus just on a certain part of the program.
I have wished many times that there would be an easy way to temporarily turn off messages that I don’t need, but commenting them out one by one feels a little bit too tedious. That’s why I decided to develop a custom console log function that will only log I messages that have the highest priority number that way I can basically shut off all other messages by giving one of my messages up higher priority value. This lets me really focus on the message that I need to focus on . So here is a custom myLog() function that I’m now calling instead of console log and it takes two arguments:
the thing to log
and a priority number
If I set the priority number of one of my calls to be high higher than the others then only that message will be shown. So for example if other priorities are number one but I do a new console log that has a priority of two, then only that log message with the highest priority will be shown .
let priority = 0;
let lastLog;

function myLog(message, logPriority) {
    if (logPriority >= priority) {
        lastLog = message;
        priority = logPriority;
    }
    console.log(lastLog);
}
//use like this
myLog(`my log message and variable ${myvar}`, 1)
One downside with this method is that unlike regular console logs it doesn’t automatically show you the file and line of code that produced the console log. We can remedy this by writing a little helper function that will use the error logging capabilities in order to also include the file and the line information together with the console log. The fileInfo is now an optional third argument that you can use:
let priority = 0;
let lastLog;

function myLog(message, logPriority, fileInfo) {
    if (logPriority >= priority) {
        lastLog = message;
        priority = logPriority;
    }
    console.log(lastLog);

    if (fileInfo){ //check that it's not undefined
        console.log(`Current file: ${fileInfo.filename}, line number: ${fileInfo.lineNumber}`);

    }

}

//for getting line number and file name


function getFileInfo() {
    const err = new Error();
    const stackTrace = err.stack.split('\n')[2].trim();
    const matchResult = /\((.*):(\d+):\d+\)/.exec(stackTrace);
    const absoluteFilename = matchResult[1];
    const lineNumber = matchResult[2];

    const currentDir = window.location.href.split('/').slice(0, -1).join('/');
    const relativeFilename = absoluteFilename.replace(currentDir, '');

    return {
        filename: relativeFilename,
        lineNumber: lineNumber
    };
}

//use like this:
    myLog(`dialogueIDSent: ${dialogueIDSent}`, 1, fileInfo = getFileInfo());
Several blog rolls on a single WordPress site using categories
Here’s a simple code example of how you can have separate blog roll areas on your WordPress website which show different types of blog content. Just add this query to your template file:
<?php
  $query = new WP_Query(array('category_name' => 'reviews'));

  if ($query->have_posts()): while ($query->have_posts()): $query->the_post();
?>

<div class="review">
  <h1><?php the_title(); ?></h1>
  <?php the_content(); ?>
</div>

<?php
  endwhile;
  else:
    echo 'No posts';
  endif;
?>
If you don’t want to hard code the blog roll in a template file, another option would be to add the category rolls to your menu in the menu editor. That way clicking on such a menu link will take you to the blog post list (archive) of the posts that belong to that archive.
CSS-only 3D fly-in animation
Have you ever wondered how to create a 3D-transition in which an element should fly past the camera onto the webpage? Here’s how you can do that using CSS-transforms:
See the effect in action here:
FLY IN!
<!DOCTYPE html>
<html lang="en">
<head>
    <meta charset="UTF-8">
    <meta http-equiv="X-UA-Compatible" content="IE=edge">
    <meta name="viewport" content="width=device-width, initial-scale=1.0">
    <title>Document</title>
    <style>
        body{
            perspective: 300px; /* the smaller, the stronger sense of perspective (like short focal lenght) */
            min-height: 95vh;
            display: grid;
            grid-template-columns: 1fr 1fr 1fr;
            grid-template-rows: 1fr 1fr 1fr;
            text-align: center;

        }

        h1{
            grid-column: 2/3; /* Just for putting the h1 to center of grid */
            grid-row: 2/3; /* Just for putting the h1 to center of grid */
            transform: translate3d(800px, 200px, 1500px); /* Set the start position for the element */
            animation: myflyin 2s; /* Activate the animation called myflyin */
            animation-fill-mode: forwards; /* Keep the position from the last keyfframe */

        }

        @keyframes myflyin { /* Define the keyframes */

            from {
                transform: translate3d(800px, 200px, 1500px); /* Starting position */
            }

            to {
                transform: translate3d(0, 0, 0); /* End position */
            }
        }
    </style>
</head>
<body>


        <h1>FLY IN!</h1>


</body>
</html>Force refresh on Brave mobile
Have you ever needed to force refresh a website with the Brave browser on a mobile device like iPhone or Android phone?
The need to do that may arise, for example, when developing websites for WordPress, because WordPress will attempt to cache the CSS files and your latest changes might not be reflected even if you reload the page.
Many websites advice you to go to the browser cache settings and clear the entire cache. But that is an overkill -there is a better and simpler way:
The easiest way to force Brave to force refresh on your mobile device is to switch the browser to desktop mode from the menu with the three dots. The feature is called “Request desktop site”. After switching to that, you can then switch back to a regular mobile page and the cache should be updated.
It’s as simple as that!
If even that is not working, there is a couple of other things you can attempt:
- Click on the slider icon right to the address bar and delete the cookies and data for that particular site
- Open the site in a private incognito tab
- Use a cache busting method like embedding a query string with a changing version number after the resource name.

Adding headings to block based widgets in WordPress
How to keep using port 10080 after many browsers block it as an unsafe port
If you have been doing web development using port 10080 you might have run into some issues recently since many browsers including Chrome and Firefox have decided to add that port to their blocked ports list.
I use a tool called InstantWP for WordPress development and it’s using port 10080 for http by default.
I first researched the option to change the ports IWP is using. It seems like it could be done from the config file which you can open from the “Advanced” tab by clicking “Edit Config File”. In the file that opens you should see a setting called PortOffset. I tried to change that but couldn’t get it to work even after trying many different numbers for the port offset.
I also tried to add a flag into Chrome’s startup parameters by right-clicking the Chrome icon and choosing properties. Then I replaced the value under “target” with the following string:
“C:\Program Files (x86)\Google\Chrome\Application\chrome.exe” –explicitly-allowed-ports=10080
However that didn’t seem to fix the situation in my case. I still got the same “unsafe port” error from Chrome.
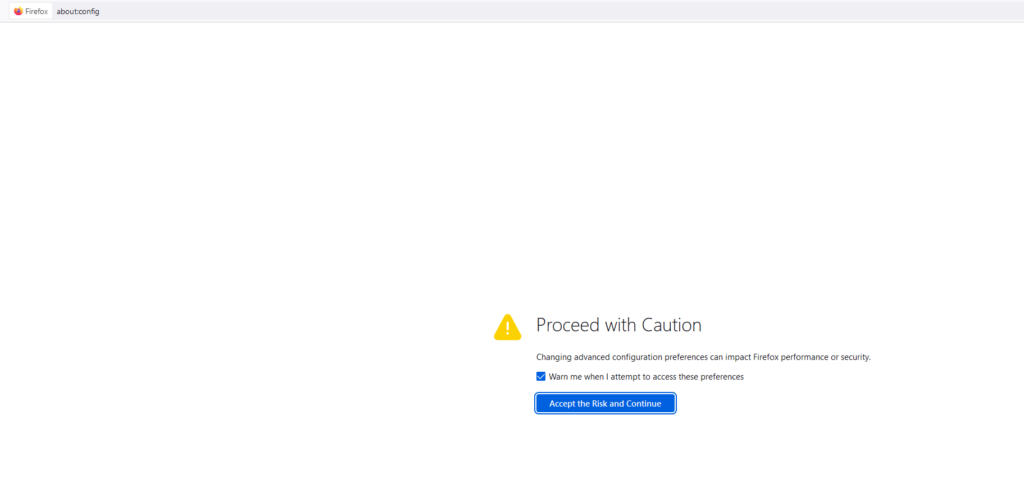
What finally helped was switching to Firefox and performing these steps:
- Type about:config to the address bar and click on the “accept the risk and continue” button.
Then paste in this string to the search bar:
network.security.ports.banned.override
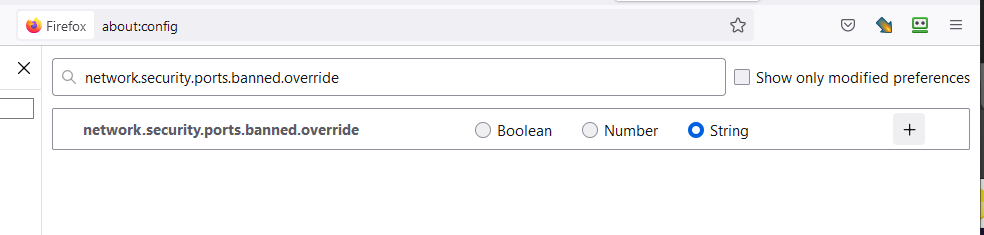
Choose “string” as the type (I know, number would seem more logical), click on the + button and enter the port number you want to allow (in my case 10080).
Now you should be able to access applications via that port!
Increment integer value in a database field using WPDB
Sometimes you need to update values incrementally in your WordPress database. You might for example have an upvote feature to which you automatically add points in an incremental fashion.
It was surprisingly hard to find examples of how to do this using Wpdb. But here’s an example of doing just that:
/* Have to use wpdb->query instead of wpdb->update because the latter assumes strings  */
$results = $wpdb->query($wpdb->prepare("UPDATE foodsenglish SET popularity = popularity + 1 WHERE dbID = %d", $foodIdToSendThePointFor), ARRAY_A);Installing Duplicator packages in Instant WordPress
TIP: If you forgot to include the installer.php file, you can unzip the zipped archive and copy the “installer-backup.php” file from there and just rename it “installer.php”.
In the Duplicator FAQ they recommend uploading the packages through the “theme folder” button in IWP. That didn’t really make a difference in my tests though (I just uploaded the files by copy-pasting with SFTP Net Drive). Note that the installer will throw an error if there are other files present in the installation folder so make sure you delete the old WordPress files. Unfortunately even with these steps we seem to get stuck on Step 3. I recommend checking the error log if this happens. You might need to install php-xml with sudo apk add php-xml. Or you might have to update your PHP version if you are getting errors like this;
INSTALLER ERROR: [PHP ERR][FATAL] MSG:Uncaught Error: Call to undefined function token_get_all() in /var/www/localhost/htdocs/wordpress/duplicator/dup-installer/lib/config/class.wp.config.tranformer.php:387
That wasn’t the main problem in my case though (it seems like a function should be enabled “By web host”).
If you get an error when trying to install that the folder doesn’t have write permissions, do the following: Check the working directory you are in with “pwd” and the contents of the folder you are currently in with “ls”. You might have to elevate yourself to root user with sudo -s and the type in cd /var/. If you can see “var” in the list, then cd into it with cd var. You can cd into localhost even if it’s not listed with cd localhost. You shouldn’t need to change folder permissions here, but if you need to do that in some other situation, you can use chmod like in this example we are giving a folder called wp2 full permissions: chmod 777 wp2.
This is what you should fill in for the configuration:
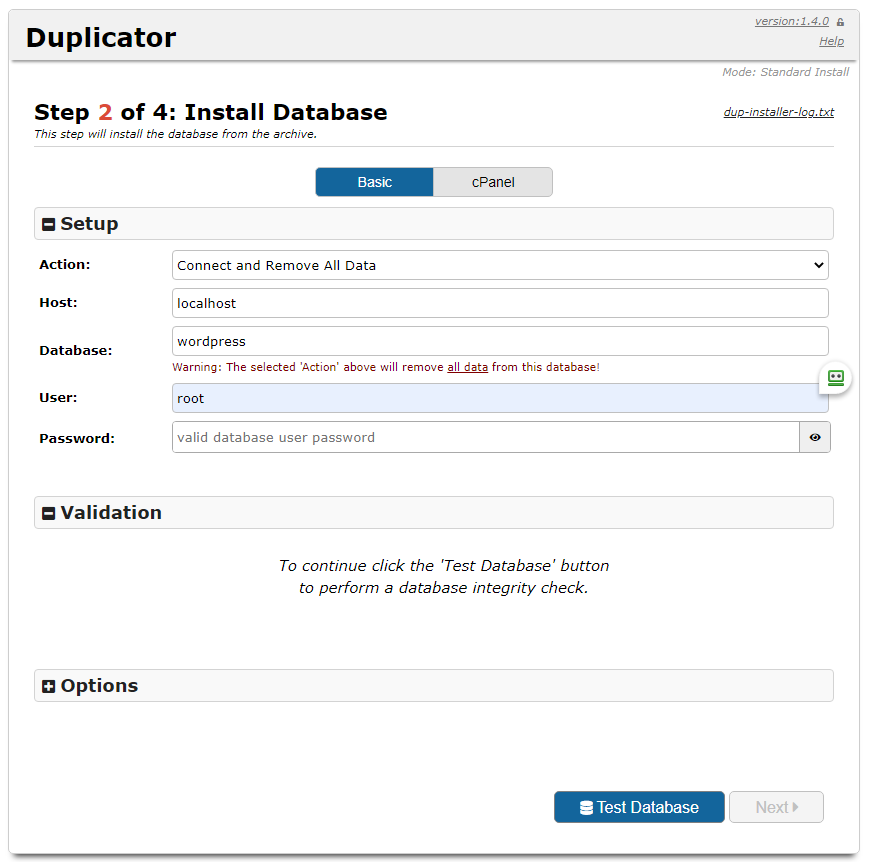
If nothing else works, just stop the installation process. Things might still work (since it might have succesfully extracted the files and inserted the data into the database). Just delete all the duplicator files from the WordPress root folder. If you get a message saying “Briefly unavailable for scheduled maintenance. Check back in a minute.” you need to also delete the .maintenance file.
How to use Git with InstantWP
If you are using the amazing free InstantWP WordPress development package often, then you might start wondering how to properly use it with Git version control. The difficulty is that trying to add the entire Linux Alpine virtual operating system to Git is too heavy, but adding only the contents of the Theme folder will not keep track of your posts and other database related content. I will outline the steps I used to get Git working with IWP below:
Continue reading “How to use Git with InstantWP”