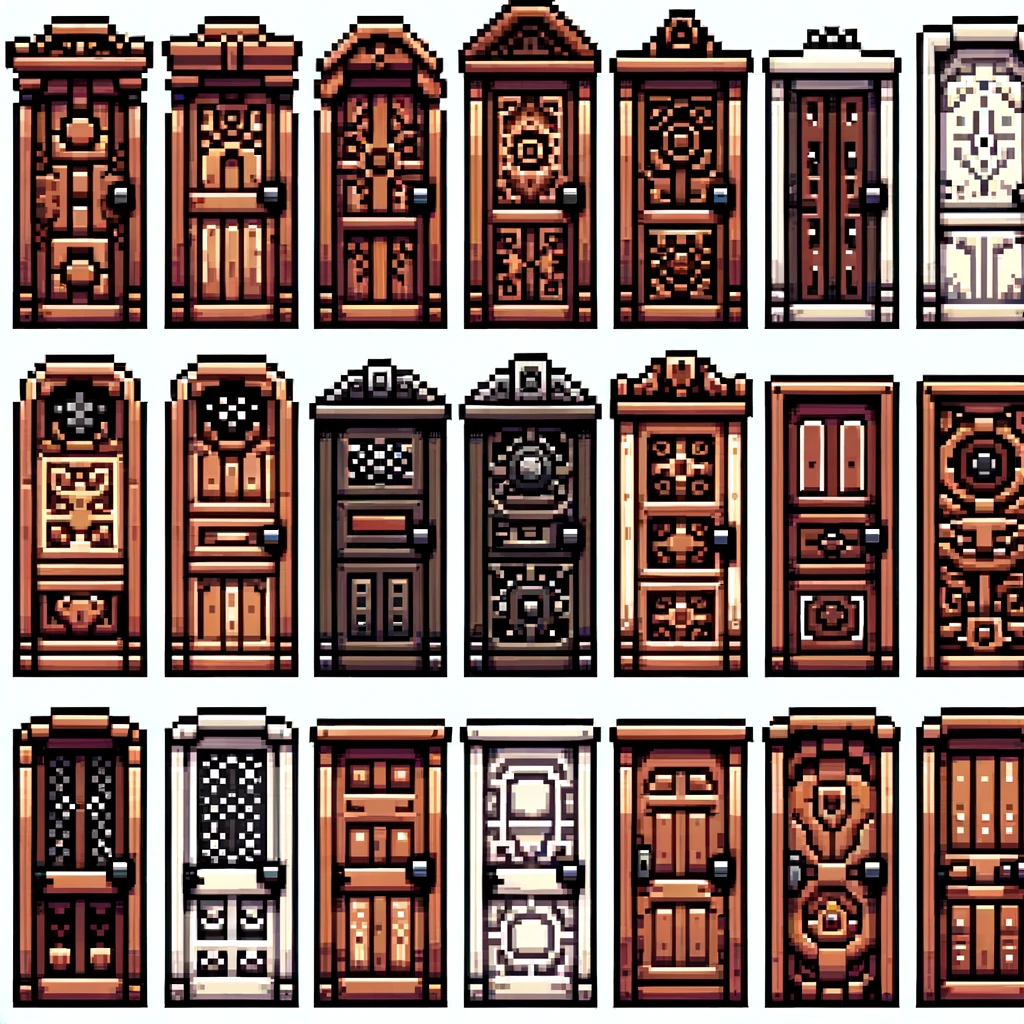
Finally, an insanely good pixel art AI

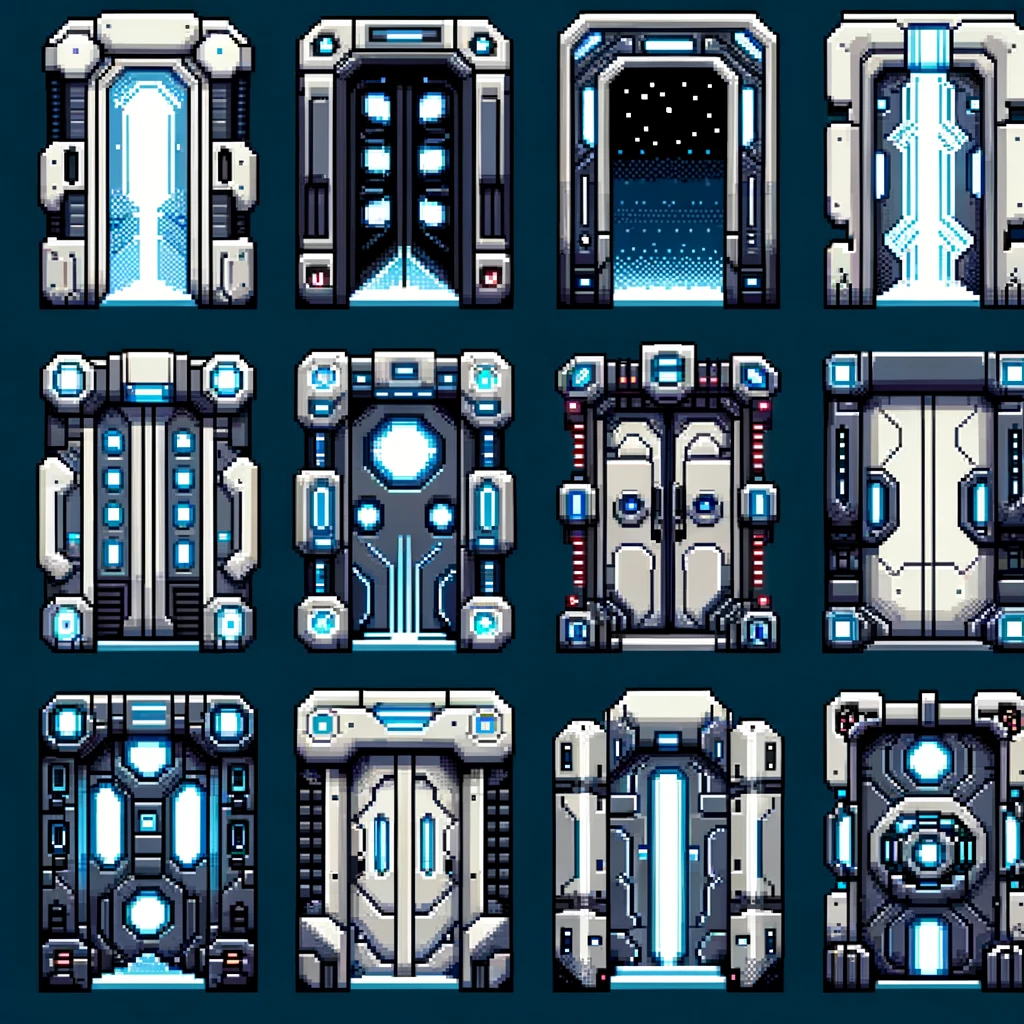
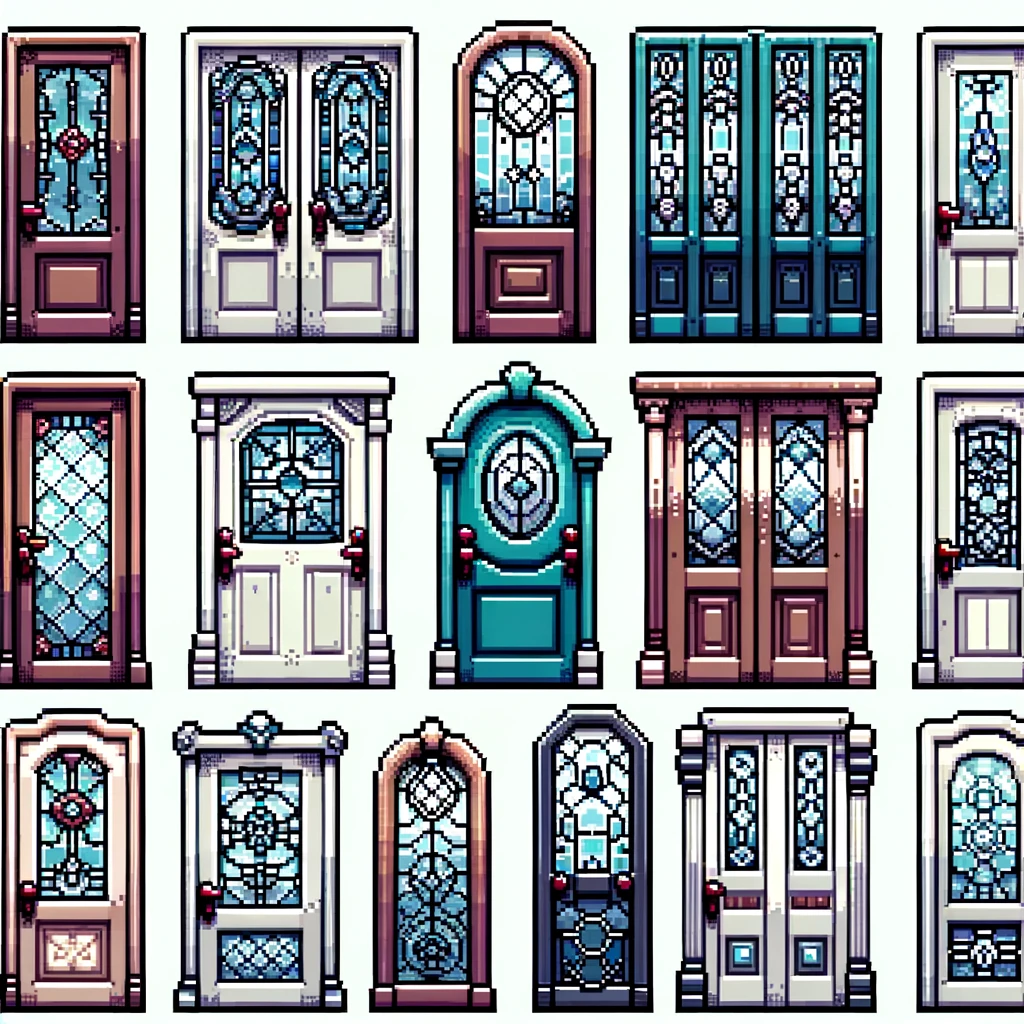
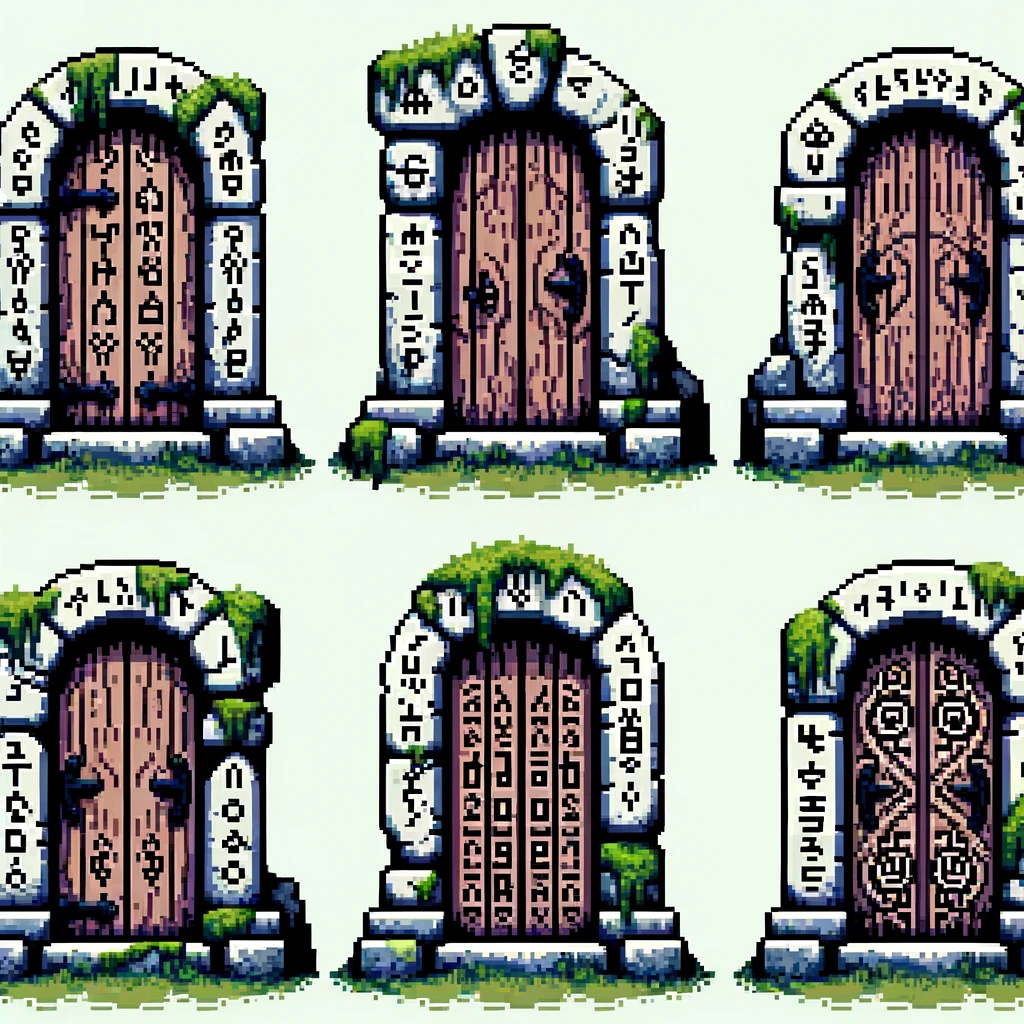
As a 2D game creator, I have been searching for an text-to-pixel art generator AI for a long time. It looks like we have finally arrived! Check out the results I got for the prompt

“a sprite sheet of several pixel art doors”!


Wow! Those are INSANELY good compared to previous pixel art generative AI’s!

So by now you must be dying to know which tool I used to generate those and how much it costs! Well I have good news for chatGPT users! I used Dalle-3, which you can now use for free with a chatGPT subscription! That’s right, since I already subscribe to chatGPT, I generated those awesome images for free!
This is getting really exciting for indie game developers everywhere!

CSS-only 3D fly-in animation

Have you ever wondered how to create a 3D-transition in which an element should fly past the camera onto the webpage? Here’s how you can do that using CSS-transforms:

See the effect in action here:

FLY IN!

<!DOCTYPE html>
<html lang="en">
<head>
    <meta charset="UTF-8">
    <meta http-equiv="X-UA-Compatible" content="IE=edge">
    <meta name="viewport" content="width=device-width, initial-scale=1.0">
    <title>Document</title>
    <style>
        body{
            perspective: 300px; /* the smaller, the stronger sense of perspective (like short focal lenght) */
            min-height: 95vh;
            display: grid;
            grid-template-columns: 1fr 1fr 1fr;
            grid-template-rows: 1fr 1fr 1fr;
            text-align: center;

        }

        h1{
            grid-column: 2/3; /* Just for putting the h1 to center of grid */
            grid-row: 2/3; /* Just for putting the h1 to center of grid */
            transform: translate3d(800px, 200px, 1500px); /* Set the start position for the element */
            animation: myflyin 2s; /* Activate the animation called myflyin */
            animation-fill-mode: forwards; /* Keep the position from the last keyfframe */
            
        }

        @keyframes myflyin { /* Define the keyframes */

            from {
                transform: translate3d(800px, 200px, 1500px); /* Starting position */
            }

            to {
                transform: translate3d(0, 0, 0); /* End position */
            }
        }
    </style>
</head>
<body>


        <h1>FLY IN!</h1>


</body>
</html>

A tool for recoloring pixel art to a new color palette

I have been searching through the webs for a long time for a good, easy to use tool for recoloring pixel art to a specified color palette. The perfect tool should make it easy and fast to test out different palettes for a provided bitmap image or a sprite sheet, but it should also make it possible to fine tune the color mappings and add new colors to the palette if needed.

This has provided to be a rather challenging task. Photoshop and other similar graphics programs do have the possibility to switch to indexed color which lets you force the image to a new color palette, but I find that workflow to be rather tedious and time consuming. Illustrator has the recolor artwork tool, but it works only with vector images.

Here are some of the tools that I did find:

Continue reading “A tool for recoloring pixel art to a new color palette”

Finally a sprite sheet recoloring process that works

I have been searching for a good workflow for testing out different color palettes for existing video game designs.

I have finally found a relatively pain free method of testing different color palettes and applying them to entire games. I will be making a video tutorial about this in the future, but before I get to that, I thought I would already explain the basics of the workflow.

Continue reading “Finally a sprite sheet recoloring process that works”

Basics of Using Cryptomatte in Blender 2.93

In the buttons area (on the right side of the interface), select the “View layer properties” tab.

Under “cryptomatte” turn on “object”, “material” or “asset”. I like “asset” since it let’s me select entire rigs that consist of several parts.

Go to the “compositing” workspace.

Turn on “use nodes”.

Add a viewer node with shift+a –> output –> viewer.

Add the cryptomatte node from Matte –> Cryptomatte.

Connect the image output from the render layers node to the image input of the Cryptomatte node. Connect the “pick” output from the Cryptomatte node to the image input of the viewer node. Render the scene (keyboard shortcut F12).

You should now see different matte colors that identify different assets in your render layer. Use the + button to access the eyedropper tool and select as many assets as you need for the matte you are building.

To see the actual matte, you can plug the “matte” output from the Cryptomatte node to the viewer.

Now you have a matte that you can use in various way when you are compositing. As a simple example, you could color correct the matted area by combining two copies of the input image with the “AlphaOver” node while using the matte as the factor. Then simply drop a color correction node like RGB curves between the bottom image connection.

Construct 3 Spritefonts with Photoshop

Creating your own Spritefonts (sometimes also called bitmap fonts) for Scirra’s Construct 3 game engine using Photoshop can be surprisingly tricky. The main difficulty seems to be in creating a grid of evenly spaced characters so that the automatic Sprite font slicing mechanism in Construct can slice them up properly. A monospace font makes this much more simple since all the characters will take up the same space by default, but monospace fonts are quite limiting stylistically. What if you want to have non-monospaced fonts neatly organized in a grid for Construct?

There are helpful tools like “Give Your Fonts Mono” which can convert a regular font into a sprite font and it even generates the spacing data for Construct 3 which you paste into the Spritefont plugin settings. The spacing data looks typically something like this;

[[20,” “],[9,”l|”],[10,”Ii.,;:!'”],[16,”`”],[17,”[]”],[18,”j”],[20,”()”],[21,”t”],[22,”1-\”\/°”],[23,”r”],[25,”f”],[26,”*”],[31,”J”],[33,”u”],[34,”hkns”],[35,”Ldq”],[36,”bcgpz03789?”],[37,”Favy256+=$<>”],[38,”eox4~”],[40,”£”],[42,”BEP#€”],[44,”HNSTUZ_”],[45,”K”],[46,”D&”],[48,”R”],[49,”C”],[50,”VXY”],[51,”AG”],[52,”MO”],[53,”Q”],[54,”mw”],[58,”%”],[69,”W”],[70,”@”]]

You can’t however do any fancy stuff like giving your characters drop shadows, strokes or gradient fills etc. But there is a work around! Just save your tranparent png image from GYFM and open that in Photoshop. Then you can play with layer styles etc as long as you don’t cross the bounding box given for each character. You can increase the bounding box size in Give your fonts mono to give yourself more room. In Photoshop you might need to cut some of the rows into their separate layers for consistent gradients, but other than that this workflow should be pretty straightforward. When done in PS, simply re-save as PNG and import to Construct 3.

Unfortunately Construct doesn’t seem to support kerning at the moment so that would have to be handled with events. It’s not the easiest of programming challenges though.

Another possibility (besides custom events) might be to make a copy of the most difficult characters in the Spritefont sheet and give them special spacing rules. Then you would need to pick that special character in the situations in which your kerning looks bad. That’s also a bit hacky and tedious. So before Construct gets proper kerning support for Spritefonts, it might be best to stick to monospace Spritefonts.