Blender, being the Swiss-army-knife -tool that it is, can also do video editing. Setting up a video editing layout is easier than ever with the new “Workspace” -system of Blender. Simply click on the + button at the end of the workspace tabs and choose Video Editing –> Video Editing. Here’s a picture:

When using Blender as a video editor, a couple of questions immediately come to mind:
- How do I perform a cut? Answer: Simply press K.
- How do I perform a ripple delete (an edit in which the gap of the deleted content is automatically closed)? Answer: There is no ripple edit feature at the moment, but it can still be done very quickly by hitting “Del” to delete, then “Page up” to jump the playhead to the previous cut and finally “Backspace” to “Close gap”.
- How can I “render the timeline” for better playback performance? Answer: The best way might be to create Proxies. In the Proxy workflow, Blender will create new, better performing versions of your video files and use them for better work speed. These are the steps you need to take to enable Proxies in Blender Video Editor:
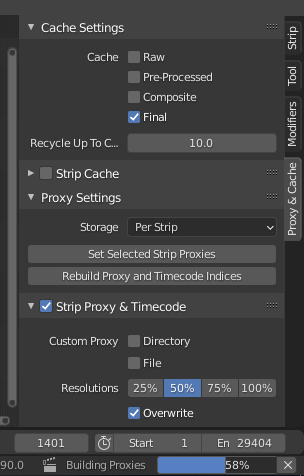
First find the Proxy Panel. It lives usually on the right side of the Sequencer (timeline looking panel). Select the clips you want to create a proxy for in the sequence. Click on “Set selected strip proxies” to set these clips up for proxy creation. It will ask for a desired proxy resolution. Then click “Rebuild Proxy and Timecode Indices”. Blender should now start creating the proxy files, next to your original files (although this location can be changed in the settings). It might take a while, but after it’s done, your playback should be much better.