Key tips for the spin tool:
-3d cursor location will be the center point of the spin
-3d viewport orientation matters
-select the spin direction from the top bar
-hold ctrl to snap to increments
Because your time is valuable
Key tips for the spin tool:
-3d cursor location will be the center point of the spin
-3d viewport orientation matters
-select the spin direction from the top bar
-hold ctrl to snap to increments
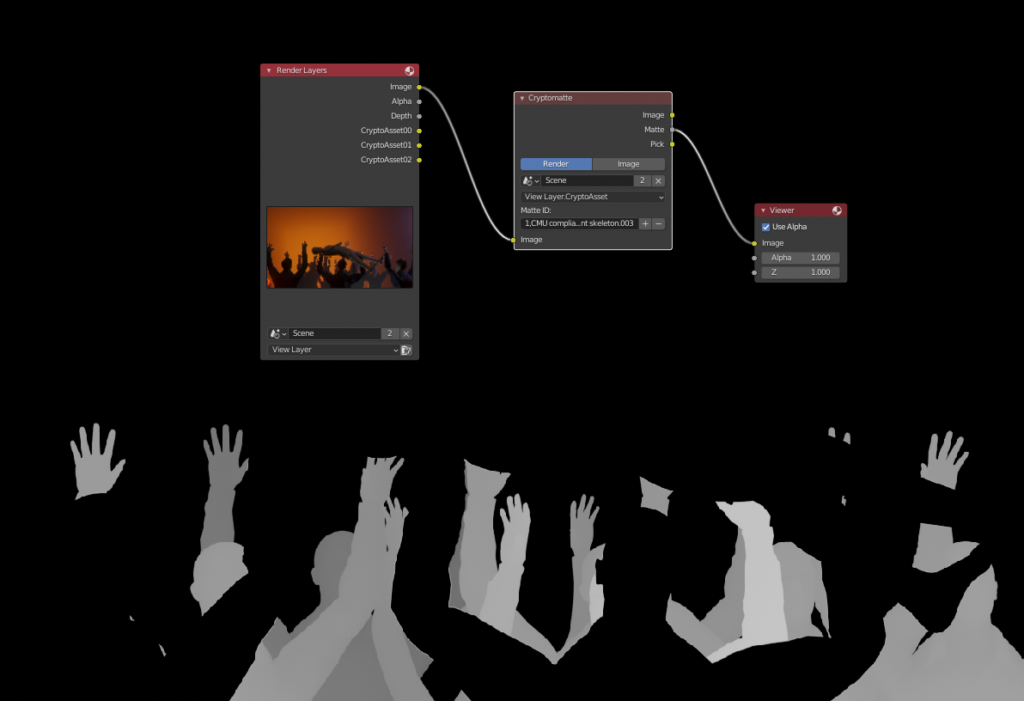
In the buttons area (on the right side of the interface), select the “View layer properties” tab.

Under “cryptomatte” turn on “object”, “material” or “asset”. I like “asset” since it let’s me select entire rigs that consist of several parts.

Go to the “compositing” workspace.
Turn on “use nodes”.

Add a viewer node with shift+a –> output –> viewer.
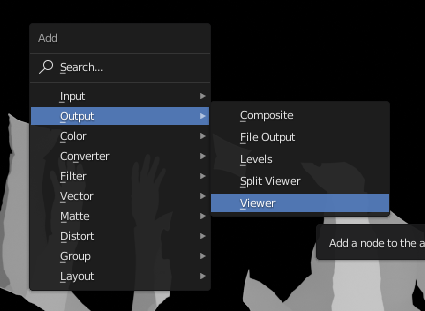
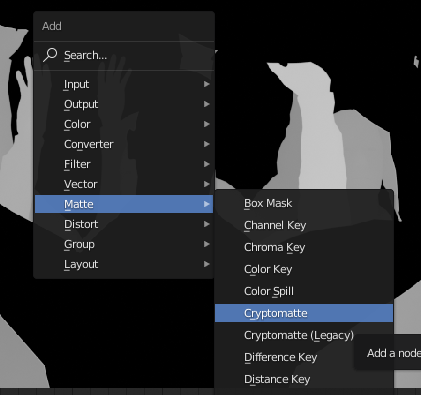
Add the cryptomatte node from Matte –> Cryptomatte.
Connect the image output from the render layers node to the image input of the Cryptomatte node. Connect the “pick” output from the Cryptomatte node to the image input of the viewer node. Render the scene (keyboard shortcut F12).
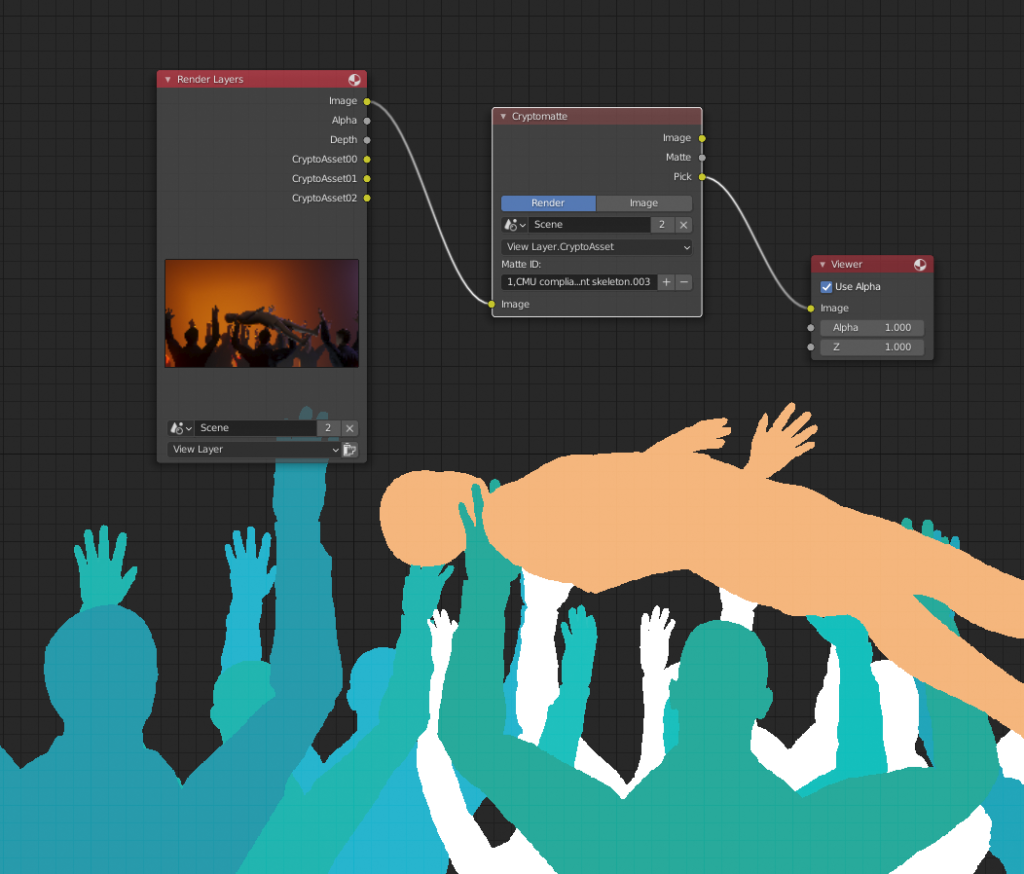
You should now see different matte colors that identify different assets in your render layer. Use the + button to access the eyedropper tool and select as many assets as you need for the matte you are building.
To see the actual matte, you can plug the “matte” output from the Cryptomatte node to the viewer.
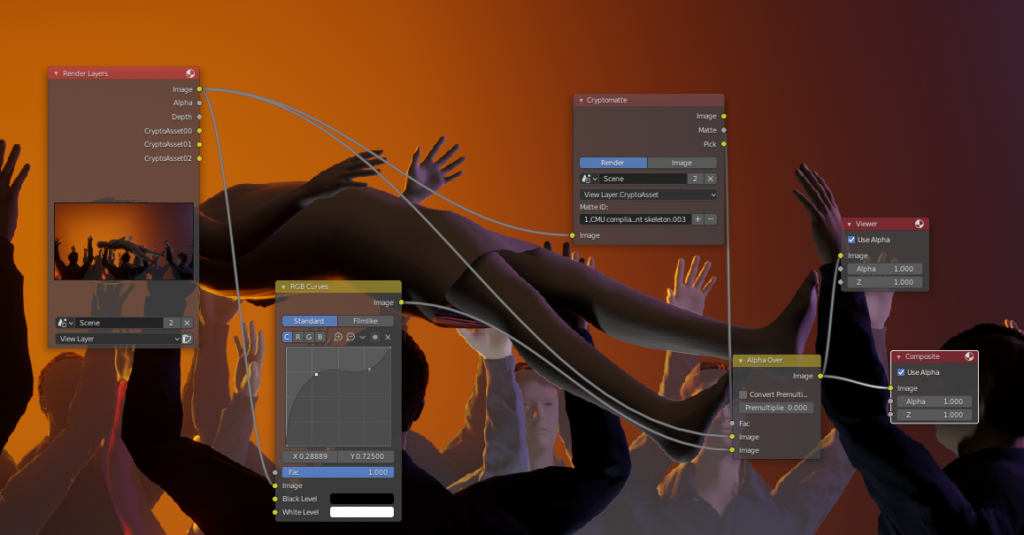
Now you have a matte that you can use in various way when you are compositing. As a simple example, you could color correct the matted area by combining two copies of the input image with the “AlphaOver” node while using the matte as the factor. Then simply drop a color correction node like RGB curves between the bottom image connection.
Blender, being the Swiss-army-knife -tool that it is, can also do video editing. Setting up a video editing layout is easier than ever with the new “Workspace” -system of Blender. Simply click on the + button at the end of the workspace tabs and choose Video Editing –> Video Editing. Here’s a picture:

When using Blender as a video editor, a couple of questions immediately come to mind:
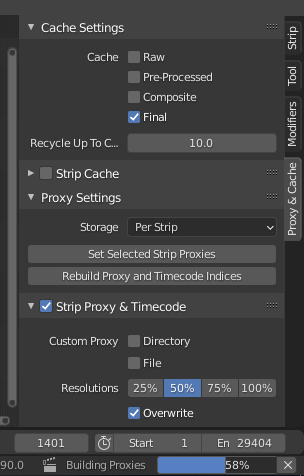
First find the Proxy Panel. It lives usually on the right side of the Sequencer (timeline looking panel). Select the clips you want to create a proxy for in the sequence. Click on “Set selected strip proxies” to set these clips up for proxy creation. It will ask for a desired proxy resolution. Then click “Rebuild Proxy and Timecode Indices”. Blender should now start creating the proxy files, next to your original files (although this location can be changed in the settings). It might take a while, but after it’s done, your playback should be much better.
Thanks to 3DTudor for this quick tip that can greatly speed up your texturing workflow! It’s based on first activating the Node Wrangler addon (comes with Blender) and then hitting shift+ctrl+T. The principled shader should be selected when you hit the shortcut.
Rendering out stereo 360 from Blender EEVEE is actually pretty easy thanks to the new eeVR addon.
Here is a quick way of getting random object colors in EEVEE with the shader/node editor:
Note that this is for separate objects, random colors for different parts of the same mesh is more tricky.
I have recently been doing hair renders in Blender and thought I would share some key tips that I have learned along the way:
I’m currently working on a project in which I need to create a lot of vector drawings. After trying Inkscape for a moment and having some frustrations with the user interface there, I decided to return to my favorite software: Blender. In this post I will document the things I learn while using the grease pencil tool to create vector art in Blender.
Continue reading “Using Blender as a vector drawing program”