Batch rename objects in Blender
Today, we will tackle an essential aspect of 3D modeling in Blender – object naming.
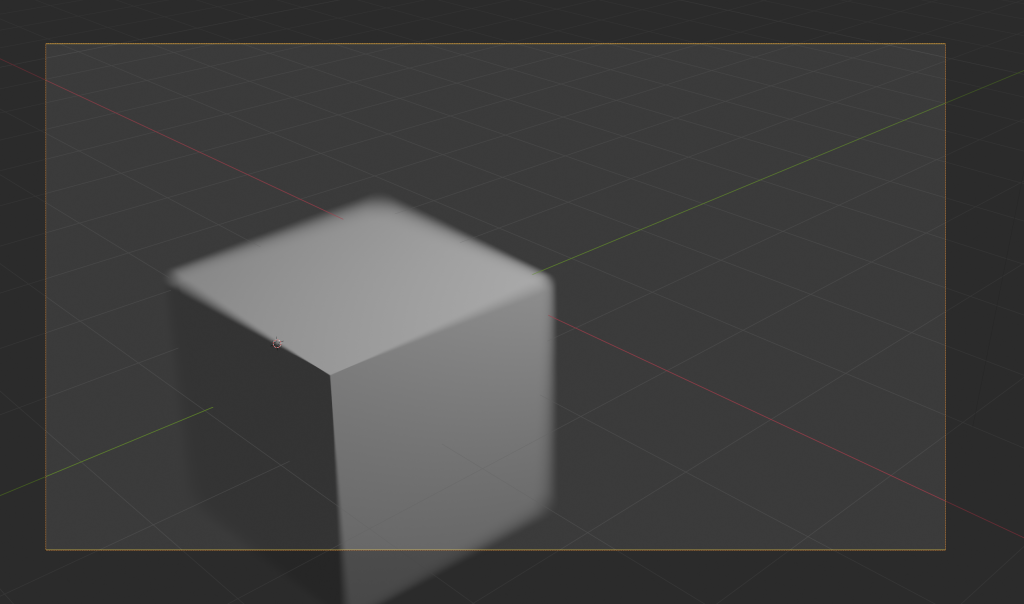
It’s easy to lose track of your objects’ names, especially when you’re working on a complex project. All too often, we find ourselves with a sea of objects, each bearing an unhelpful name like ‘cube’, which doesn’t do much to tell us about their function or importance in the scene.
However, fear not! Blender offers a convenient tool for mass renaming of objects, allowing you to maintain order and clarity in your work. Let’s walk through the steps.
Firstly, you need to select the objects you want to rename. If your objects are neatly organized in a collection, simply right-click on the collection and choose ‘Select Objects’. Alternatively, if you’re dealing with individual objects, click on the first object, hold down ‘Shift’, then click on the last object. This selects those two objects and all others in between.
With your objects selected, hit ‘Control’ and ‘F2’. This brings up the ‘Batch Rename’ dialogue box. Here, you’ll specify the current name string you want to change – in this case, ‘cube’ – and what you’d like to replace it with. Click ‘OK’, and voila! All your selected objects are now renamed, saving you from any future confusion.
If you ever forget the shortcut, remember that you can always find the ‘Batch Rename’ option under the ‘Edit’ menu.
That wraps up today’s tutorial! We hope you found this helpful in managing your 3D workspace. Thanks for watching and remember to subscribe for more quick and easy Blender tips. Until next time, this is One Minute Video Tutorials.com, making your Blender journey a breeze, one minute at a time.
Remove weird box characters from pasted text in VS Code
Today, we’ll be discussing a common issue you might encounter when copying and pasting text from other programs into Visual Studio Code.
At times, you may notice strange boxes appearing in your pasted text. These boxes represent unrecognized characters in VS Code. They usually occur due to discrepancies between character encoding standards across different programs.
If you’re looking for a quick fix to eliminate these, here’s a simple process you can follow:
First, select and copy one of these unknown box characters. Next, open up the ‘Replace’ dialog box. Paste the copied box character into the ‘Find’ field of the dialog box. Then, leave the ‘Replace’ field blank. Upon clicking ‘Replace All’, VS Code will replace all instances of this unrecognized character with nothing, essentially removing them from your text.
And there you have it! Your pasted text is now free of any unknown characters.
Thank you so much for watching and see you next time on OneMinuteVideoTutorials.com
How to concatenate strings and variable values in GDevelop
I’m currently studying the relatively new open source “code free” game engine GDevelop, so I will write some tips and tricks regarding it here.
One basic thing you should learn to do in any game engine is mixing strings and variable values together. The way to do this varies in different game engine.
In GDevelop, you can do this:
"Score is " + GlobalVariableString(myVar)
Backup projects in DaVinci Resolve 18
Click on this button in the project manager:

Click on the i-button:
Click on the backup button:

Render a folder full of STL files to PNG images
I wanted to create images out of all the STL-files I had 3D-printed so far. Here is a script that automates the process using Blender.
import bpy
import os
import math
from bpy_extras.object_utils import world_to_camera_view
def clear_scene():
bpy.ops.object.select_all(action='SELECT')
bpy.ops.object.delete()
def setup_camera_light():
bpy.ops.object.camera_add(location=(0, -10, 5))
camera = bpy.context.active_object
camera.rotation_euler = (1.0, 0, 0)
bpy.context.scene.camera = camera
bpy.ops.object.light_add(type='SUN', align='WORLD', location=(0, 0, 10))
light = bpy.context.active_object
light.rotation_euler = (1.0, 0, 0)
def create_red_material():
red_material = bpy.data.materials.new(name="RedMaterial")
red_material.use_nodes = True
red_material.node_tree.nodes["Principled BSDF"].inputs["Base Color"].default_value = (1, 0, 0, 1)
return red_material
from mathutils import Vector
def set_camera_position(camera, obj):
bound_box = obj.bound_box
min_x, max_x = min(v[0] for v in bound_box), max(v[0] for v in bound_box)
min_y, max_y = min(v[1] for v in bound_box), max(v[1] for v in bound_box)
min_z, max_z = min(v[2] for v in bound_box), max(v[2] for v in bound_box)
# Calculate object dimensions
width = max_x - min_x
height = max_y - min_y
depth = max_z - min_z
# Calculate object center
center_x = min_x + (width / 2)
center_y = min_y + (height / 2)
center_z = min_z + (depth / 2)
# Calculate distance from camera to object center
distance = max(width, height, depth) * 2.5 # Increase the multiplier from 2 to 2.5
# Set camera location and rotation
camera.location = (center_x, center_y - distance, center_z + (distance / 2))
camera.rotation_euler = (math.radians(60), 0, 0)
def import_stl_and_render(input_path, output_path):
clear_scene()
setup_camera_light()
bpy.ops.import_mesh.stl(filepath=input_path)
obj = bpy.context.selected_objects[0]
# Set camera position based on object bounding box
camera = bpy.context.scene.objects['Camera']
set_camera_position(camera, obj)
# Apply red material to the object
red_material = create_red_material()
if len(obj.data.materials) == 0:
obj.data.materials.append(red_material)
else:
obj.data.materials[0] = red_material
# Set render settings
bpy.context.scene.render.image_settings.file_format = 'PNG'
bpy.context.scene.render.filepath = output_path
bpy.ops.render.render(write_still=True)
# Set transparent background
bpy.context.scene.render.film_transparent = True
# Set render settings
bpy.context.scene.render.image_settings.file_format = 'PNG'
bpy.context.scene.render.filepath = output_path
bpy.ops.render.render(write_still=True)
def render_stl_images(input_folder, output_folder):
for root, _, files in os.walk(input_folder):
for file in files:
if file.lower().endswith(".stl"):
input_path = os.path.join(root, file)
output_file = os.path.splitext(file)[0] + ".png"
output_path = os.path.join(output_folder, output_file)
import_stl_and_render(input_path, output_path)
if __name__ == "__main__":
input_folder = "3D Prints"
output_folder = "/outputSTL"
if not os.path.exists(output_folder):
os.makedirs(output_folder)
try:
render_stl_images(input_folder, output_folder)
except Exception as e:
print(f"Error: {e}")
How to use:
Save the script in a python file. You can call it for example renderSTL.py. Change the input and output folders in the script to fit your situation.
Make sure you have Blender in PATH so that you can run it by simply typing “Blender” in a command prompt. If you don’t have it in PATH, open “enviroments variables” and edit the “PATH” variable under “system”. Add the path to your Blender installation as a new path.
Open up a command line in the folder which has the proper path to your STL root folder and paste this command in:
blender –background –factory-startup –python renderSTL.py
Blender should now render images out of all your STL files in the background and save them into the output folder.
The New Pose Library Workflow in Blender
Here’s how to work with the Blender 3.4 pose library and assets browser:
Create the pose you need in pose mode. Select the bones that are required for the pose.
Save poses (still in pose mode) from the right side toolbar’s “animation” tab by clicking “Create Pose Asset”:

You can name the pose from the F9 operator dialogue.
You only need one pose for each side, since the poses can be flipped with “Flip Pose”.
Simply click on a pose thumbnail to apply it.
You can also right click on a thumbnail to select all the pose bones.
You can click and drag on a pose thumbnail to mix between to poses.
The thumbnail from the pose is rendered from the active camera. You can later change it from the Asset Browser window if needed from the “generate preview” button:

If you want to create a global “user library”, save the .blend file in the Assets directory. By default it’s in Windows: C:\Users\myusername\Documents\Blender\Assets\
It should now show up under “user library” in the assets browser, also for any new .blend files that you create.
You can save as many files as you need to the Assets folder, and each one of them will show up in the Assets panel under “user assets”
Find out the sequence number of the latest commit in a Github repository
To find out the order number (or how manyeth) the latest commit is in a Github repository, open up the command line in the folder of your repository and type in:
git rev-list --count HEAD
Find out the number of a commit using it’s SHA:
git rev-list --count <commit-SHA-1>
git rev-list --count 0b26b659f33332c70ebaa962d21171c5ffda27e5
How to Go back in time with a Github Repository
In this video we are loading an older version of a Github repository in order to inspect the code at an earlier point.
Developer tools: Pause code execution with a breakpoint only when a certain loop index is true
If you want to pause your code execution in Chrome developer tools only after a certain iteration number of a loop has been reached, simply right click on the line number and choose “add conditional breakpoint”. Then just type in your condition and your done. Now the execution will only pause if the variable value is what you defined!