Sample colors with browser
Creating a Hue Wheel in Photopea
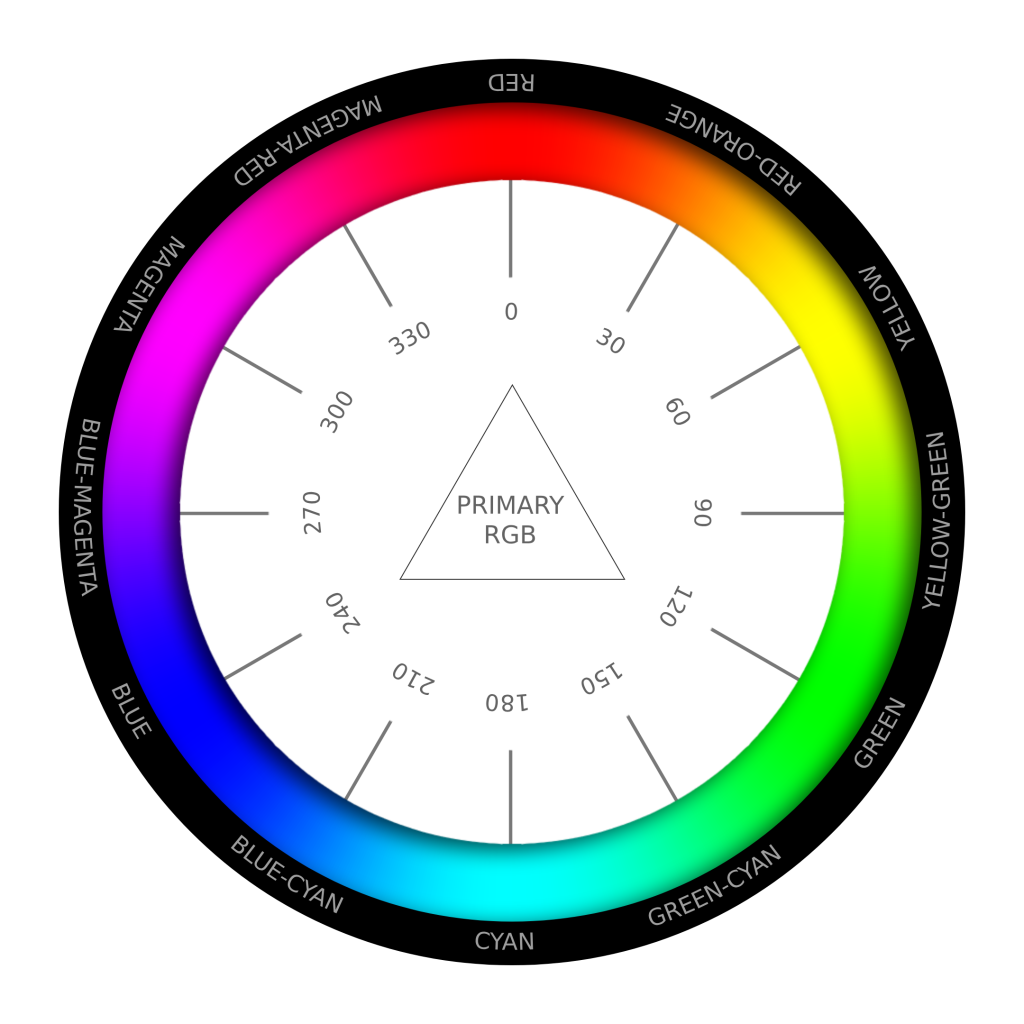
Free hue wheel download

If you are looking for a hue wheel chart with named hues that you can download, you have come to the right place. Here you go. It has alpha transparency too. Stay tuned for a tutorial on how to create such hue wheel in a graphics program.
If you need the PSD, get it here for a dollar: https://ecationary.gumroad.com/l/bwjgh
How to View Encrypted Filezilla Passwords as Plain Text
Where is the default SyncThing folder in Windows
Syncthing is a great program for file sync between devices.
When you set it up on a new device, it can sometimes be a bit difficult to find a folder that you have shared with the new device in the actual file system. The path might by default look like ~MyFolderName
That actually translates on Windows to C:\Users\SyncthingServiceAcct
So go into that folder and you will be able to find your SynchThing files!
How to import Bitcoins from a paper wallet to the Mycelium app
Installing Syncthing on a Raspberry Pi
Installing Syncthing on a Raspberry Pi is a straightforward process that involves a few steps to get it up and running. Here’s a guide to help you install Syncthing on your Raspberry Pi:
- Update Your System
Before installing any new software, it’s a good practice to update your system. Open a terminal and run the following commands:sudo apt updatesudo apt upgrade - Add the Syncthing Repository
Syncthing isn’t available directly from the default Raspberry Pi OS repositories, so you’ll need to add the Syncthing repository. First, download release PGP keys:curl -s -o syncthing-release-key.asc https://syncthing.net/release-key.txt - Add it to a keyring:
sudo mv syncthing-release-key.asc /etc/apt/trusted.gpg.d/ - Add the Syncthing repository to your sources list:
echo "deb https://apt.syncthing.net/ syncthing stable" | sudo tee /etc/apt/sources.list.d/syncthing.list - Install Syncthing
Now that the repository is added, update your package lists and install Syncthing:sudo apt install syncthing - Configure Syncthing to Run Automatically
Syncthing can be configured to start automatically for your user. Usesystemctlto enable and start the Syncthing service. Replacepiwith your username if you are not using the default Raspberry Pi OS user:systsudo systemctl enable syncthing@pi.servicesudo systemctl start syncthing@pi.service - Accessing Syncthing
By default, Syncthing runs on port 8384. You can access it through a web browser athttp://localhost:8384if you are on the Raspberry Pi, or athttp://<Raspberry-Pi-IP>:8384from another computer on the same network. - Adjust Firewall Settings (if necessary)
If you have a firewall enabled on your Raspberry Pi, make sure to allow traffic on port 8384. This command can open the necessary port:sudo ufw allow 8384 - Update and Maintenance
Syncthing will be updated along with your system packages whenever you runsudo apt updateandsudo apt upgrade.
Now you should have Syncthing installed and running on your Raspberry Pi. You can start adding devices and sharing folders as per your requirements.
Free and Open Source Browser-based Font Manager
I couldn’t find a simple free font manager for managing all my fonts, so I decided to create one using Node.js.
It takes in a fonts-folder of your choosing (and it can also read all the nested sub folders) and lets you easily preview and categorize your fonts. It works on Windows, Mac and Linux. I’m giving it away for free here:
Cathy Directory Printer is amazing
The directory print software named Cathy is pretty amazing. It was designed for creating file catalogues of different disks, so that it is easy to search for your files even if the physical disk is not currently attached to the computer.
What makes this software really weird is that it hasn’t been updated since 2009 -but it still works great! And being so old, the file size is ridiculously small, just 153 KB.
Here is a link for downloading Cathy 2.33:
https://www.portablefreeware.com/index.php?id=1716
This is the basic workflow:
Run the Cathy.exe file and go to the “Catalog” tab. Click on the three dots … to point it to a disk to scan and click “add”.
After a little while the disk has been indexed and a new .caf file has been created for it, right next to the Cathy.exe. Now you can browse to that directory to see what files it has, even if the disk is no longer connected.
This allows you to search hundreds of disks at once, without any of them being physically present. Just go to the “Search” tab and type your search term to the “pattern” field and hit search. Cathy will breeze through all your catalogs and show you all matches from all the different drives. Now you know which drive you need to connect, in order to get to your file.
The .caf files are interchangeable, so you can create them on a different computer and just copy and paste them next to Cathy.exe and it will “see” them when you restart the program.